
Everyone is used to making a ribbing of some sort for the cast on beginning of just about every kind of knitted garment. And why not? It is indeed a great utilitarian pattern: ribbing tames stockinette from rolling and draws the width of the fabric in and even acts as a visual frame to the rest of the knit. But…it is kind of, erm, well, utilitarian in appearance. Doncha just get tired of ribbing sometimes? Well, how about trying folded hem, instead? How about trying a folded, picot hem? Heh, heh–now, we’re talking!
There are a a few things to remember about a folded hem, however. For one, it is folded. So you will end up with a double thickness of knitted fabric. Not a problem if you are using lighter yarn (I’m knitting with fingering weight in the photos) but can make for some unpleasant bulkiness if you are using heavier yarn. Secondly, since it is worked in stockinette stitch, it does not draw in like ribbing does. I usually compensate by using one size smaller needles for the hem and then size back up when I get to the main body of the piece. Lastly, a folded hem will have a tendency to flip up or fold over just above where it is attached if it is located right next to a larger swathe of stockinette stitch. This is easily cured by working a patch of garter stitch right next to the hem instead. Make it a design element like I have done in my example below and no more flipping up.

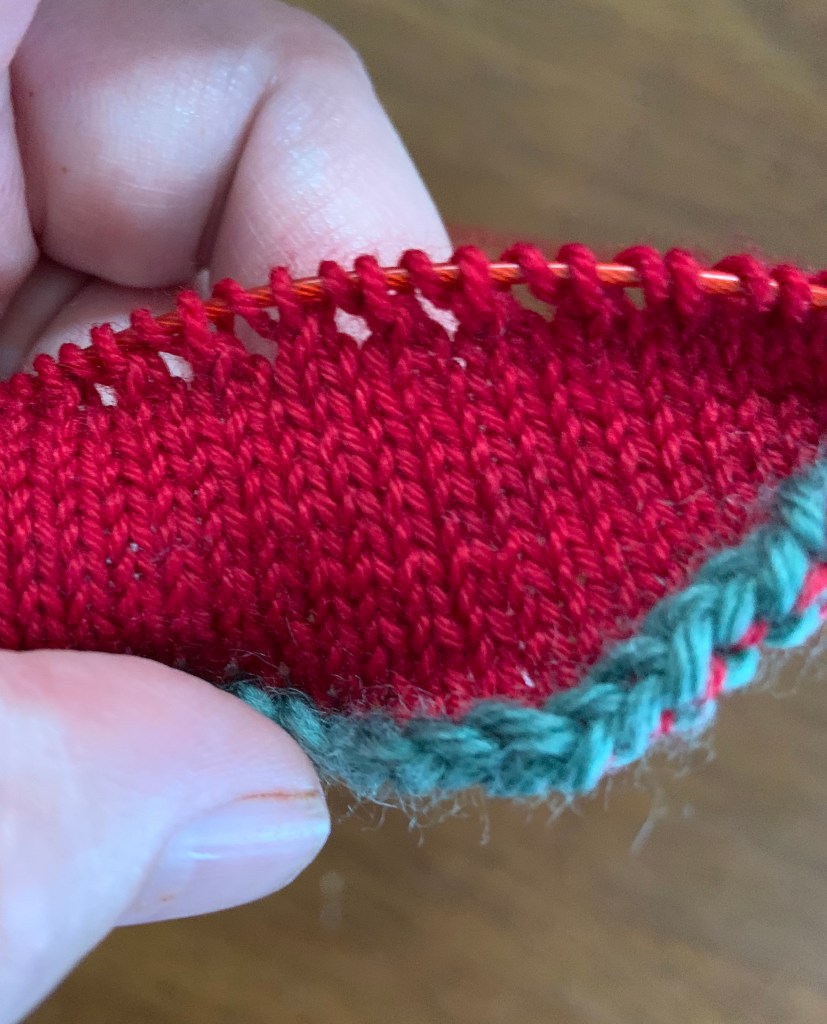
Isn’t that a lovely finished bottom edge? Ok! Let’s do it!

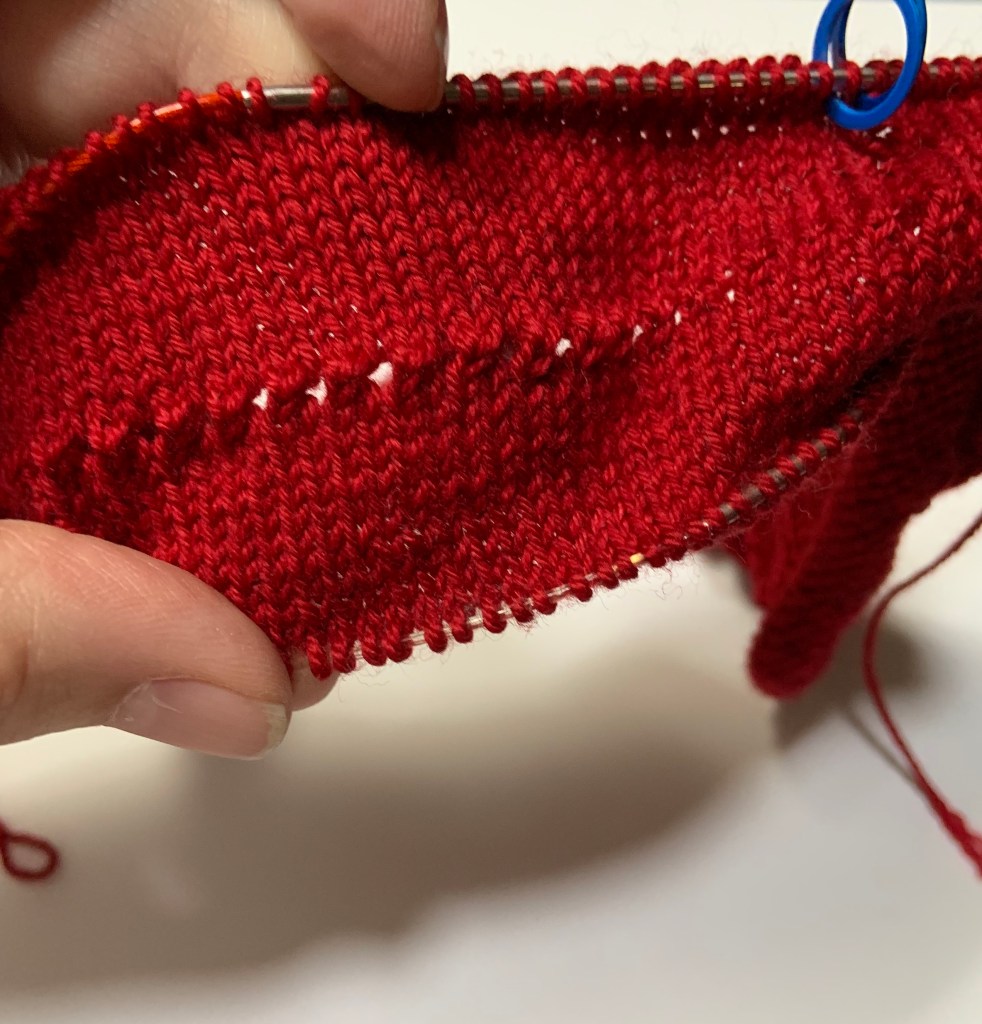
Cast on the desired even number of stitches provisionally with some waste yarn of about the same weight but a different color from your main yarn. (See my previous post for a more detailed breakdown of how to do a provisional cast-on). Then, begin knitting with your main color, attaching and knitting in the round if that is what is called for. Knit in stockinette stitch to the desired length of your hem, keeping track of the number of rows/rounds that you have knit.
Then knit the entire row as [K2tog, YO] — this is your picot or fold row. After that, knit the same number of rows as before the picot row. Remove your waste yarn (see previous post) and place the bottom stitches on another needle.
You can see in the photo that the K2Tog’s naturally want to fold in half, so let’s just let them do that! Bring the bottom edge up, let the fold happen and line up the two edges so that the bottom edge is behind the top edge.
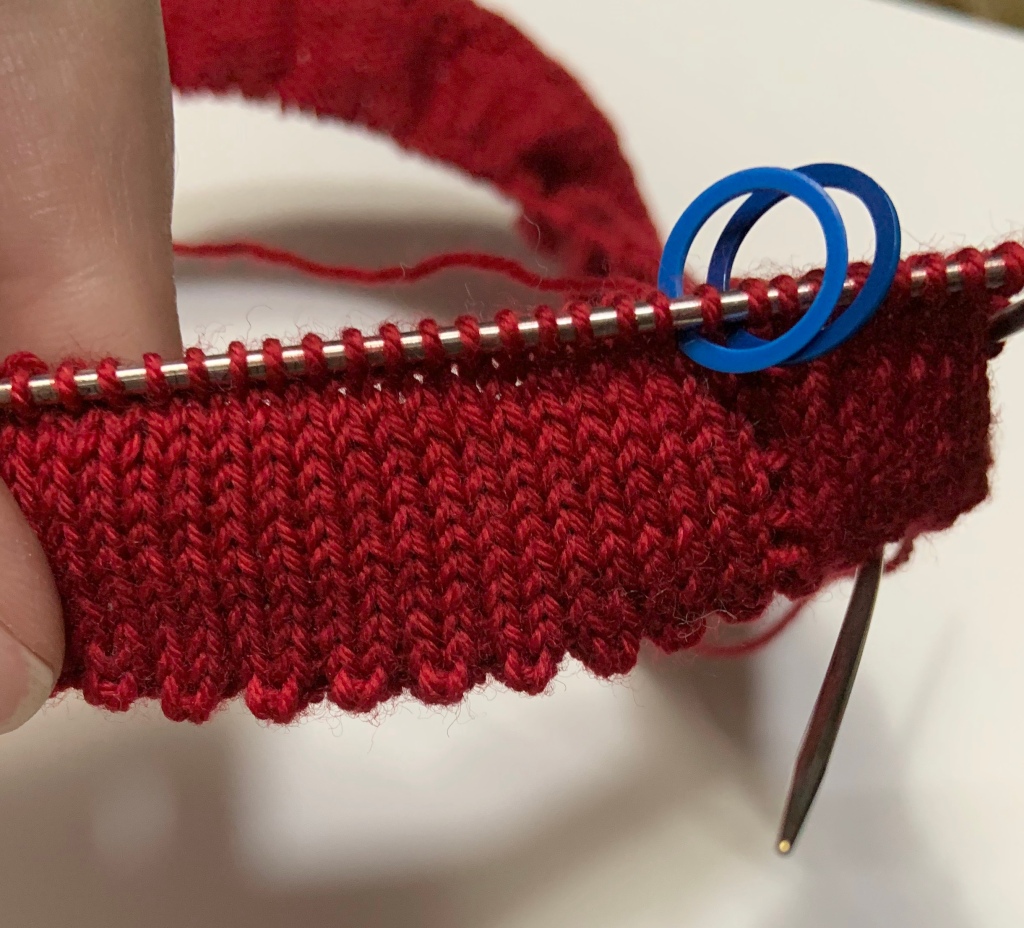
Line up the two needles so that they are even.
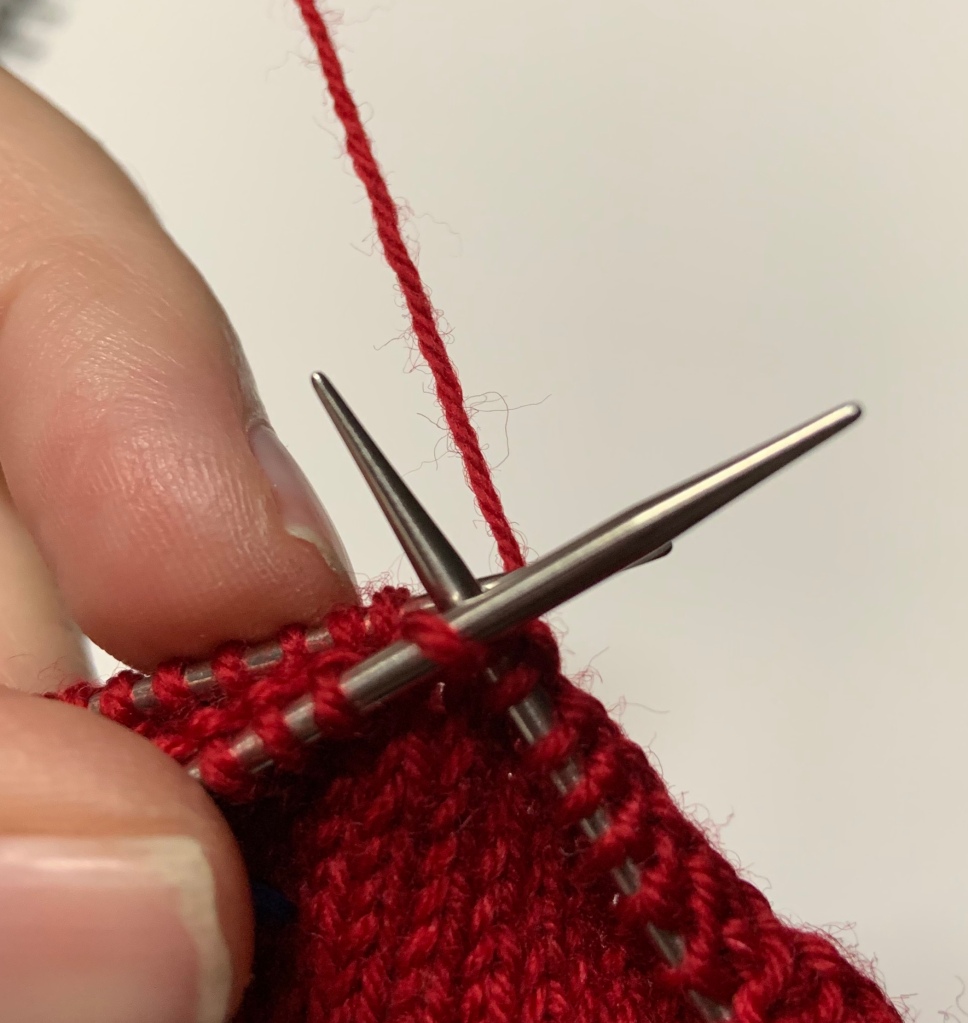
Anchor the the back edge to the front by simply knitting them together, stitch by stitch. First, insert the right needle knitwise into the first stitch on the front left needle…
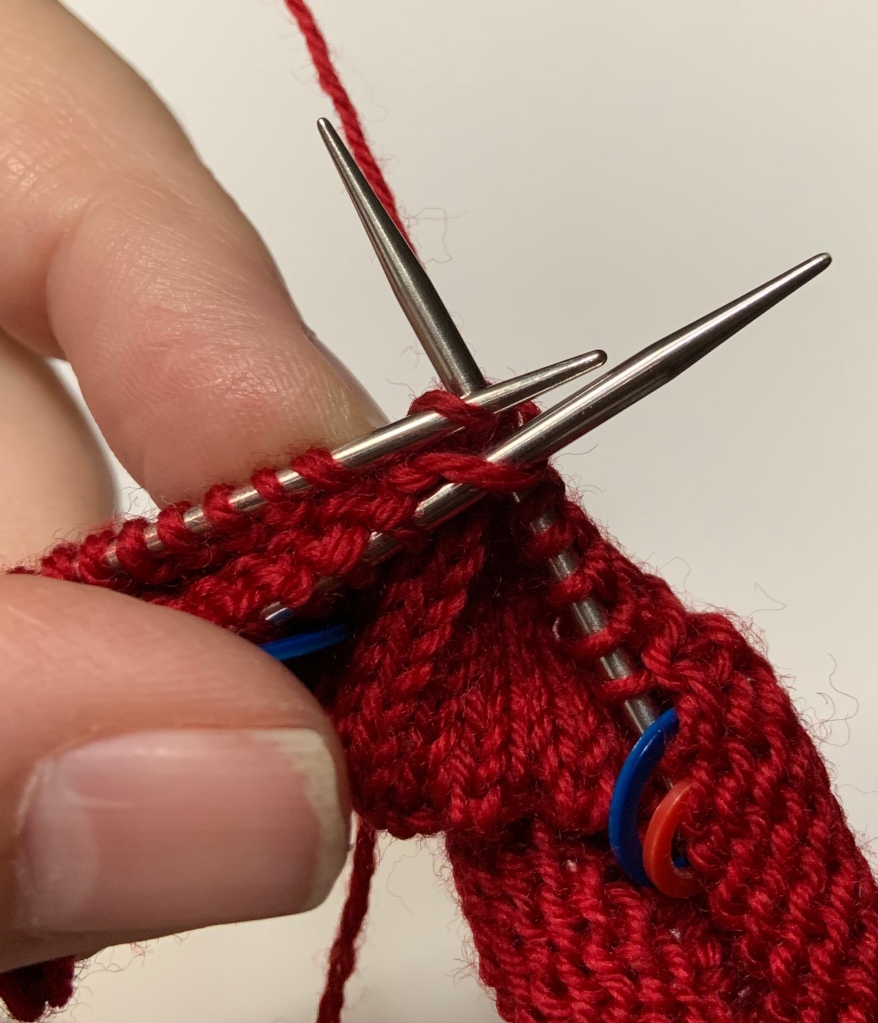
And then continue to poke the right needle back and insert it knit wise into the first stitch of the back left needle. Then, and only then, grab the working yarn with the right needle and pull it through both stitches successively. Lift the two stitches just worked off their respective left needles. Repeat.
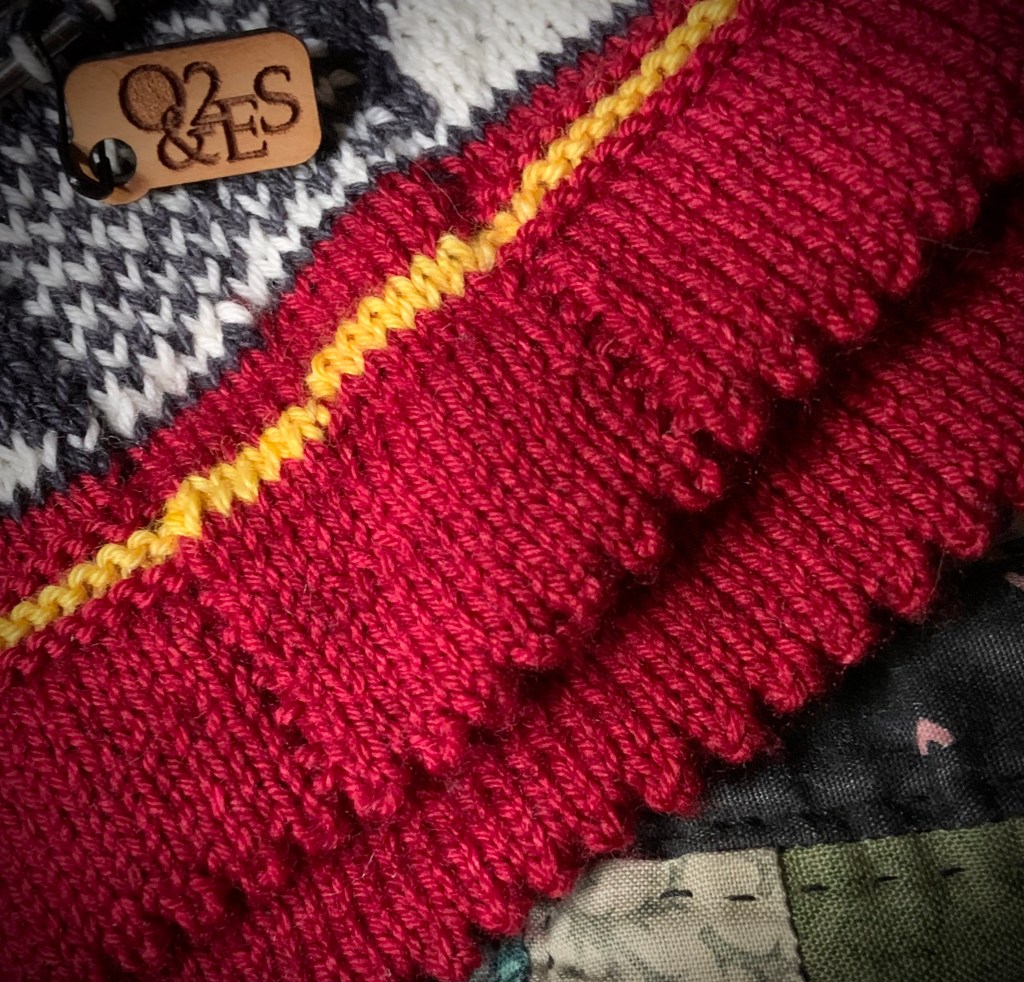
The beauty of attaching the hem in that manner is that it results in a perfectly stretchy and flexible point of attachment. There is no rigid seam line to limit expansion. The hem itself lays flat and has a delicate and interesting picot or pointy edge. What’s not to love? Try it out at the top of a sock, edge of a sleeve or even the bottom of a tunic.

Oh crap! Are both these used in our steeking project? (said over Deonne’s shoulder as she crawls under the bed to hide)
LikeLike
Well, now…if I said, that would be letting the cat out of the bag, wouldn’t it? lol
LikeLike
LOLOL! You crack me up, lady!
LikeLike
Hi, Thank you so much for this helpful post. I’ve literally just finished a top down tunic where the hem edge is rolling horribly (i cord bind off on stockinette) so was researching how to do a double hem. Do you have any tips about how to do it top down please?
LikeLike
Sure! I’ve tried various methods of anchoring the edge when making a folded hem top down and not been happy with appearance or stretchiness. My fav method ended up being just a loose bind off and then loosely whip stitching that to the purl bumps of one of the garter stitch rows on the inside. I will be blogging about that in a month or so if you want to see photos of that.
LikeLike
Thanks Lizzie! I’ve loved a folded picot hem since the first pair of socks I’ve ever knit! Reading this actually reminded of that.
I’m knitting a Flax sweater & I’ll probably use this on the sleeves…and maybe even the whole hem? We’ll see. 😁
LikeLike