

A cast-on edge is meant to be a permanent foundation to your knit. There are various methods depending on how you want it to look and how stretchy you want it to be. But…sometimes you don’t want that foundation to be so permanent. You want to be able to cast on and knit, of course, but if you know in advance that you want to pick up that bottom edge with live, workable stitches later (lengthen a sleeve or sock leg, for example) make your knitting life easier and cast on provisionally. That is: cast on with some waste yarn to act as a foundation that you can then easily remove later.
You will need some waste yarn in a different color. This will be your placeholder cast-on row to get started knitting your project and it will be removed later and discarded. Choose a waste yarn that is A. a strongly contrasting color to your real project yarn, B. not very fuzzy or “sticky” and C. the same weight or thickness as your working yarn or just a bit thicker. You will also need a crochet hook of an appropriate size to handle your waste yarn. Oh, and grab your knitting needle, too and we’ll get started!

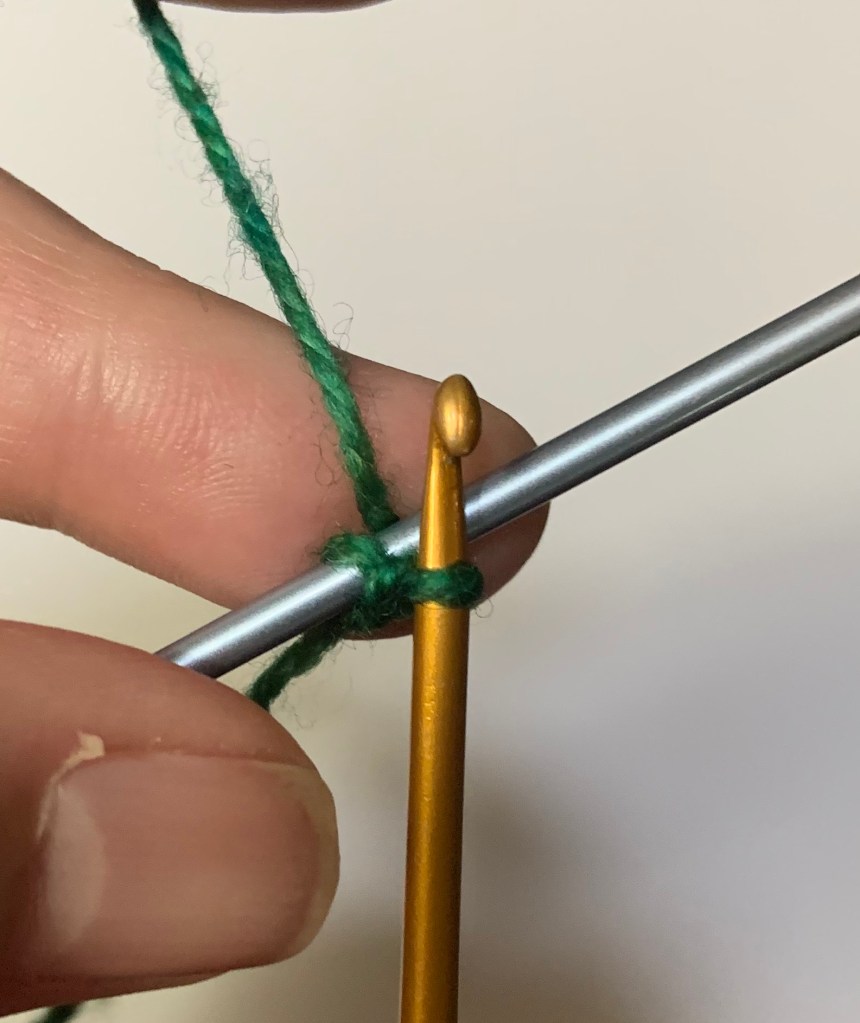
- Make a slipknot loop

2. Place the loop on your crochet hook and the working yarn behind your knitting needle

3. Lean your crochet hook over the knitting needle and grab your working yarn and…

4. Pull the yarn through your loop. Yay! you now have one stitch on your knitting needle. The next step is crucial: take your working yarn and pass it between the crochet hook and knitting needle so that it’s behind the knitting needle again.
5. et Voila! There it is: the working yarn is behind the knitting needle again so you can lean the crochet hook back as in step 3.
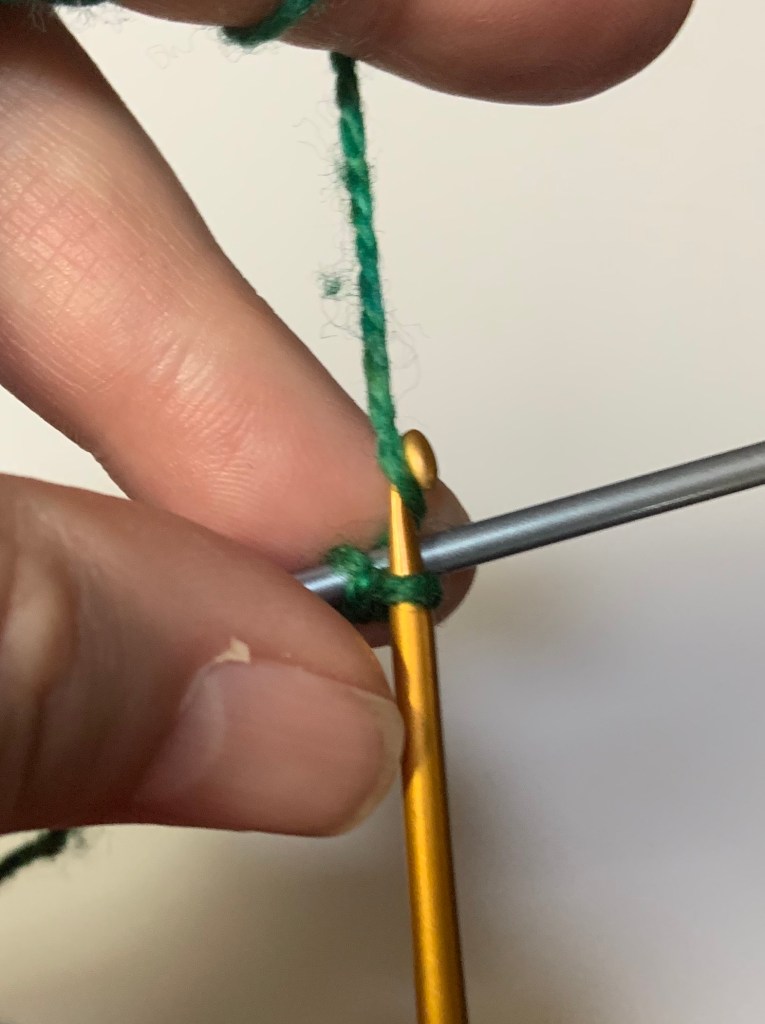
6. I’m grabbing the second stitch here…

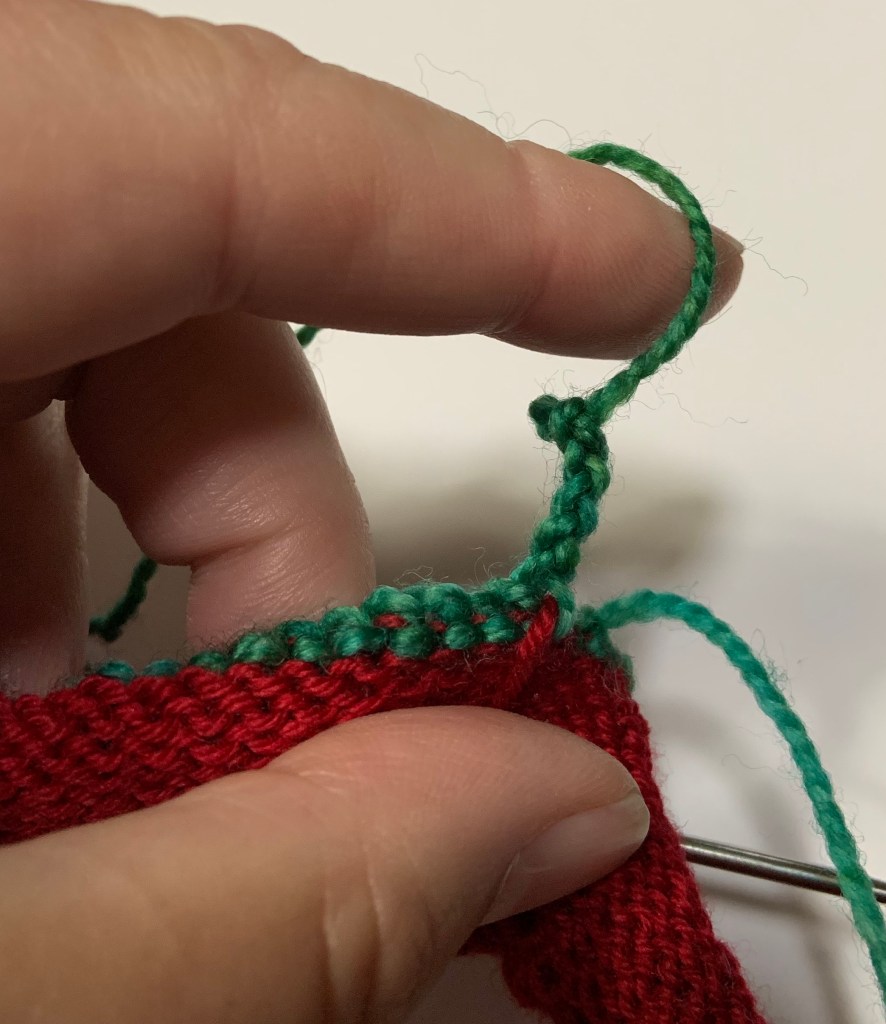
7. I’ve got a bunch of stitches now.

8. When you have crocheted the required number of stitches onto your knitting needle, chain a few additional crochet stitches that hang down and leave a tail.

9. Break your waste yarn and pass through the final loop. Don’t pull that loop super tight, you will want to undo it later so leave the last loop large and easy to fiddle with. Well, that’s your provisional cast on–Hooray! It’s actually a pretty quick and easy process. We are not quite done, though: let’s go over what to do later, when you want to pick up and work the live stitches again.
Here’s what that looks like. You have knit your thing and now you are coming back to your waste yarn. I like to hold up the piece with the wrong side facing me as shown and at the end where your single crochet tail is. Undo the last stitch of the tail and pull out the crochet stitches until you get to the actual knitting and then stop. Do not just rip out the waste yarn willy nilly!

Instead, insert your needle from the right into the live stitch that the last waste yarn stitch is in. Once it’s all the way in, gently tug out the waste yarn; it should just pop out. Move the tip of your needle over and repeat to the next stitch to the left of the one you just picked up. Pick up each stitch one by one in this manner until you have all of them on the needle.
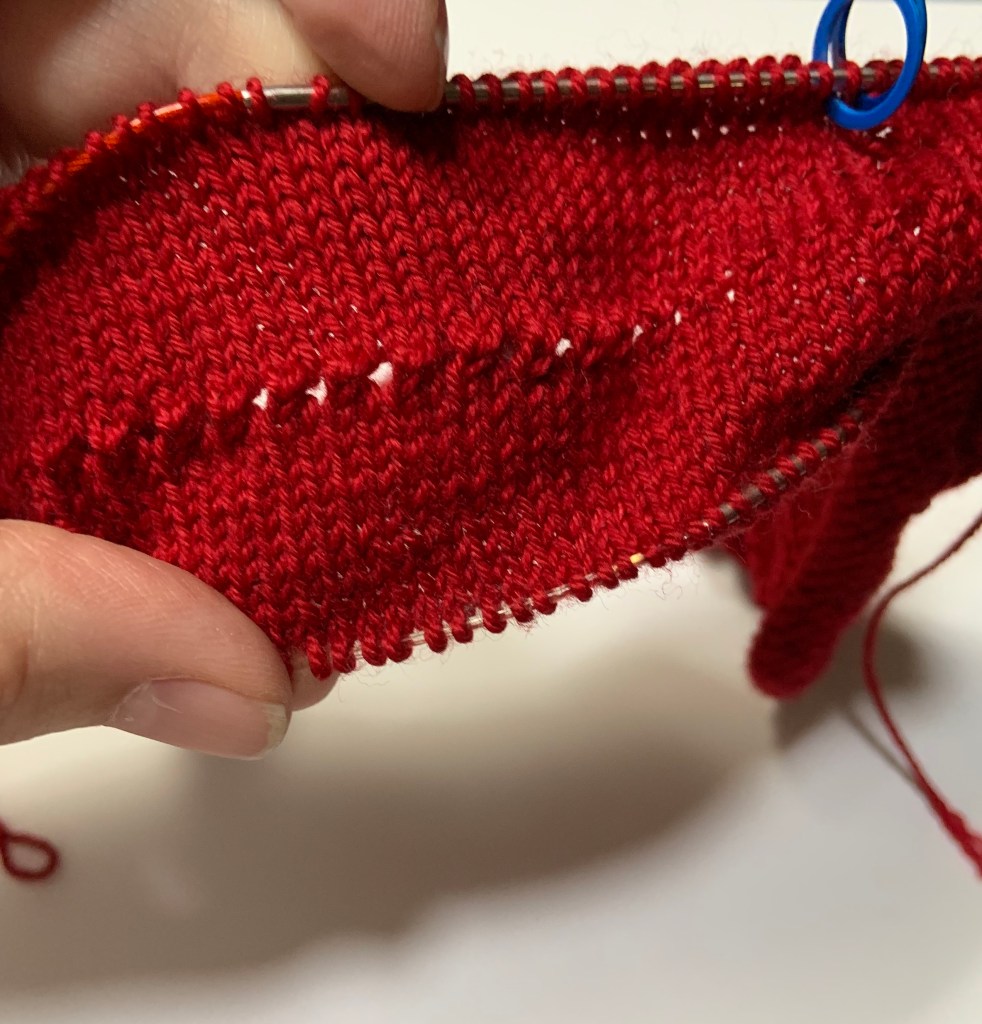
And that’s it! You now have both edges of your piece with live stitches and so you are ready to fold and make a hem, or lengthen a sleeve cuff or whatever it is you need to do.

Excellent, clear instructions Thank you.
LikeLike