
I’ve been Christmas knitting lately and had the occasion to knit buttonholes to finish off the front of a vest. I had made buttonholes in the past and while they worked, they weren’t great. They were not super neat and they had an annoying loop of yarn at one end that consistently caught on the buttons and made their use fiddly. Ugh! I certainly wanted better buttonholes for a gift! Luckily, I was paging through one of my favorite pattern books of all time, Barbara Walker’s Second Treasury of Knitting Patterns, looking for something else, when I came across a how-to for a one-row, beautiful buttonhole. This recipe was not actually created by the inimitable Ms. Walker; she credits Bernice L. Hampson for the submission of this procedure (many of the patterns in her second and later treasuries were sent in to her by her request after her publication of the first treasury). Regardless, this is now my go-to buttonhole recipe. It’s easy, you work it in one row, it’s super neat and works beautifully in multiple stitch patterns. Stockinette, garter stitch, seed stitch and ribbing all bear this buttonhole well. If you are centering the buttonhole, be aware that it will appear below the row that you work it in. And of course, work a sample to make sure it’s the appropriate width for the buttons you wish to accommodate and be sure to calculate an even distribution of buttonholes in your button band or selvedge edge..
Ok–ready for the actual tutorial? Here we go, step by step:

Work up to where you want to start your buttonhole.
Bring your yarn to the front. Then slip the next stitch purl-wise.
Pass the working yarn to the back and drop it and leave it. You will not need it for the next few steps. (It will, essentially, wrap around the base of the slipped stitch.)
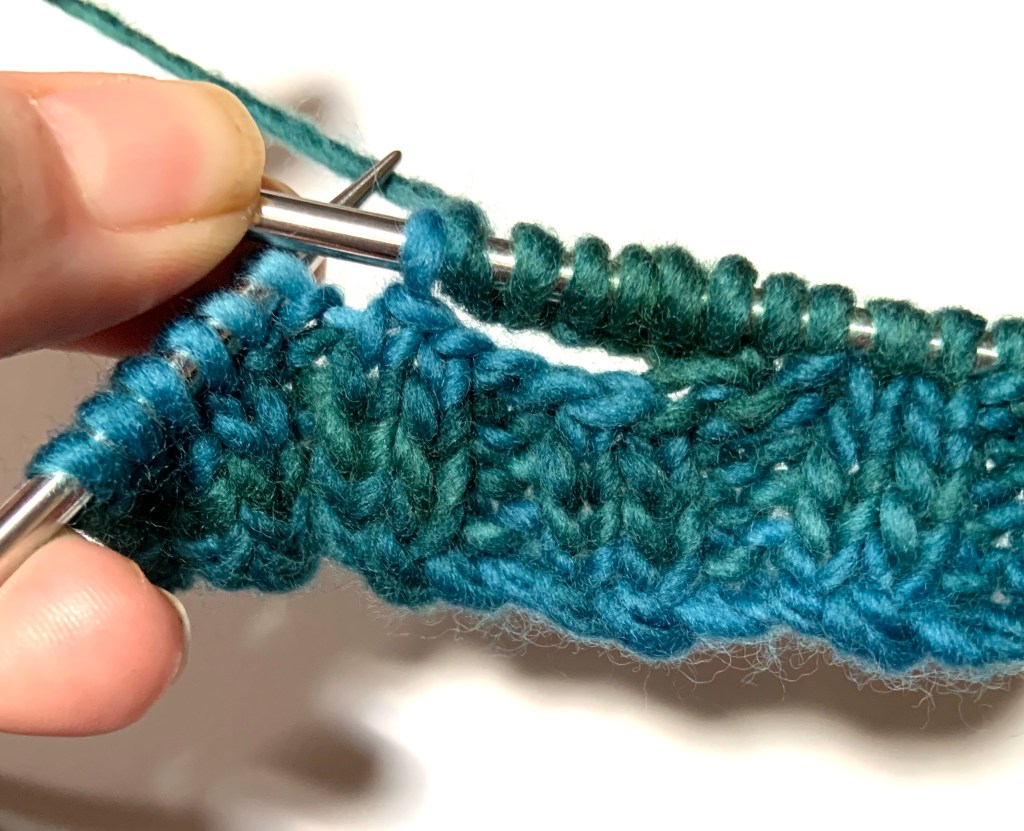
Slip another stitch from the left needle to the right needle purl-wise.
With the tip of the left needle, pass the first slipped stitch over the second one. You have bound off one stitch.

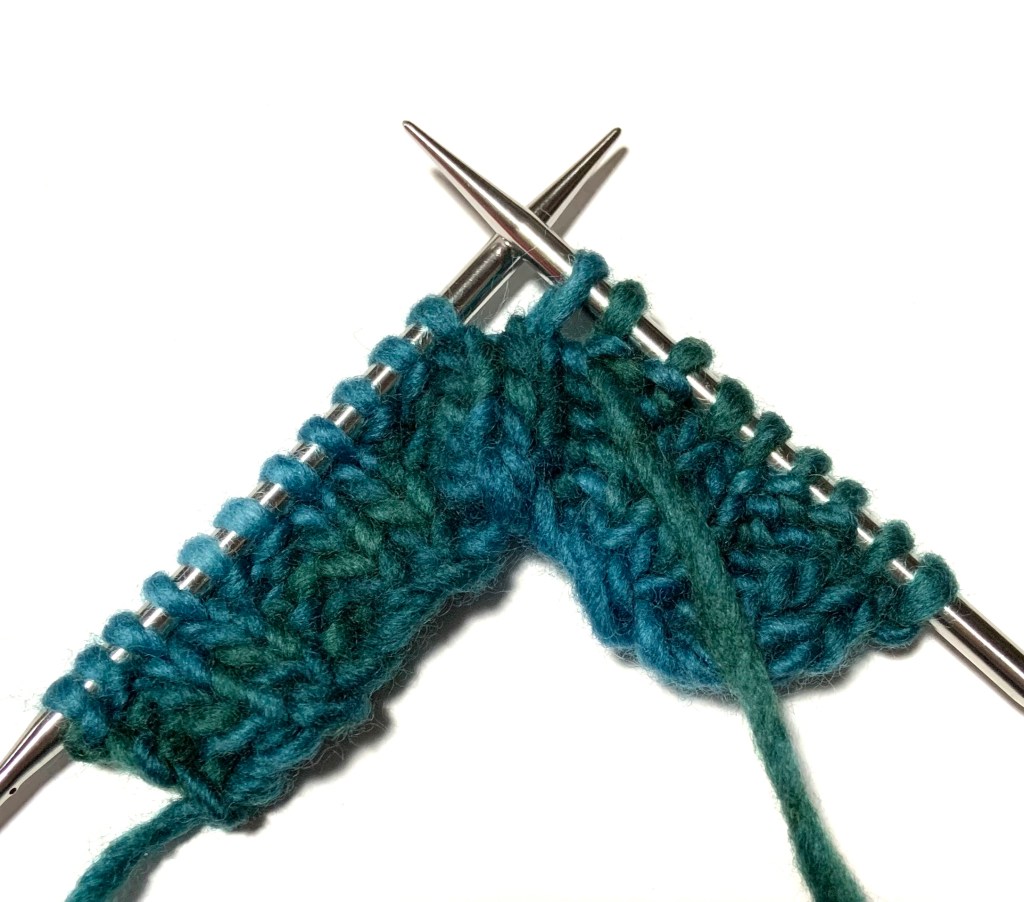
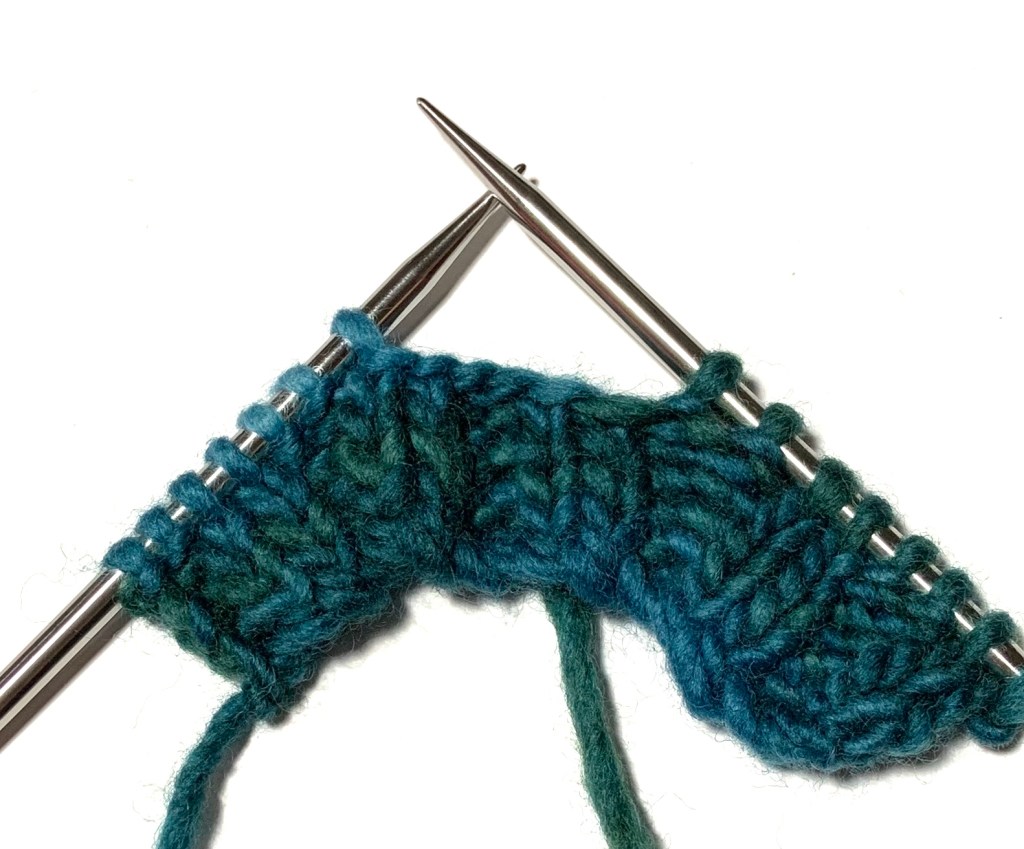
Repeat this process of binding off as many stitches as you need by slipping to the right needle and passing the most recent stitch over. I have bound off 5 stitches in the photo here.
Slip the last stitch back over to the left needle.
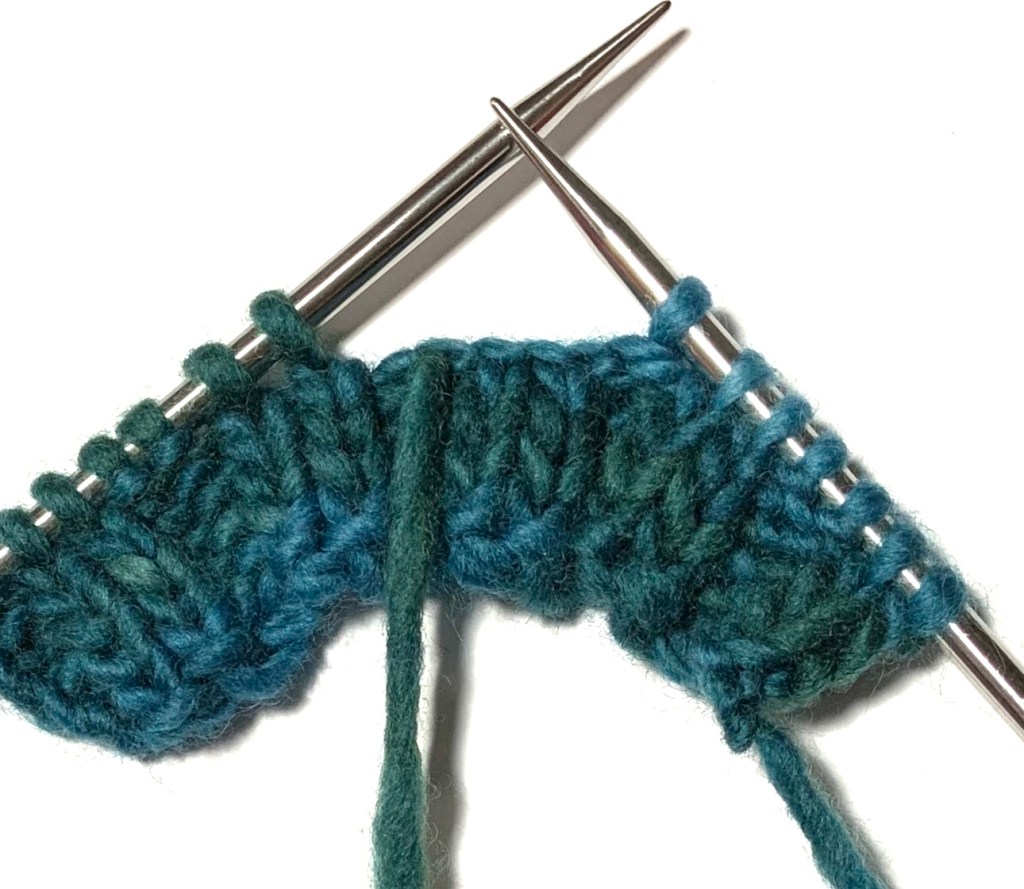
Turn your work. Hey–there’s your working yarn! Hello!

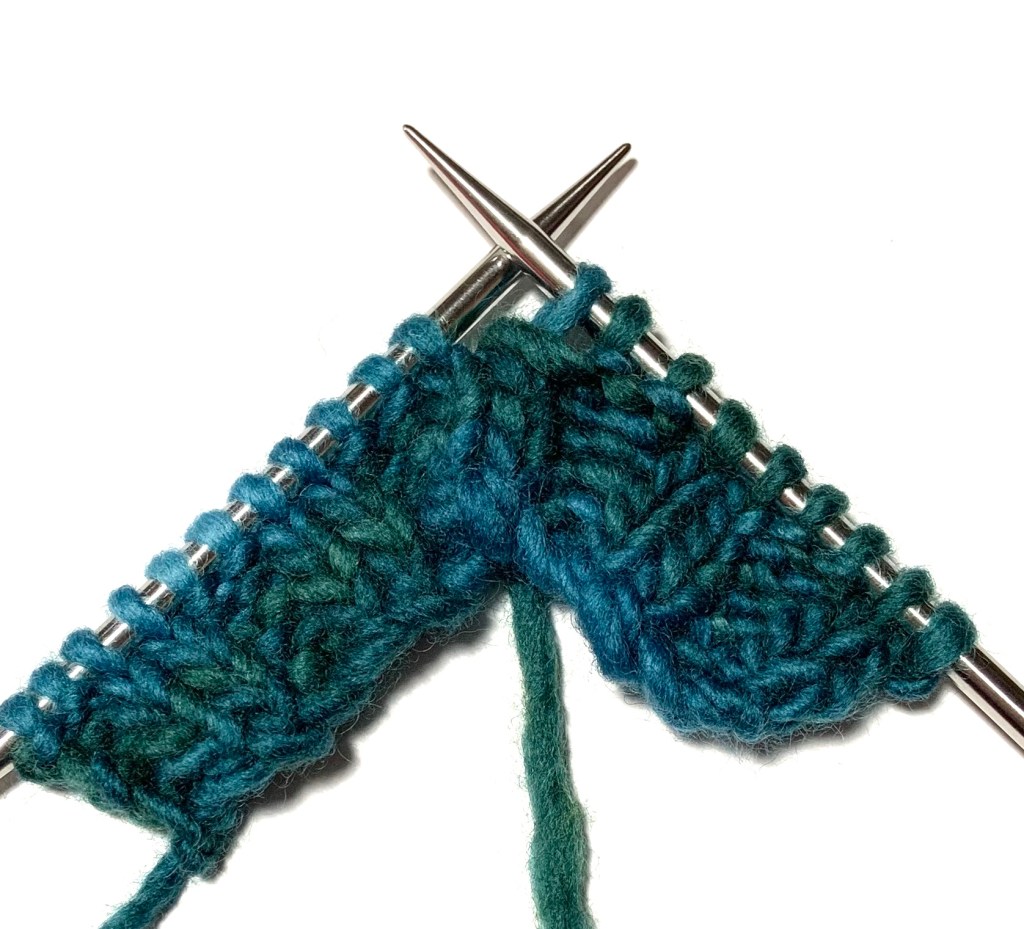
Pass your working yarn to the back and cast on the same number of stitches that you just bound off PLUS ONE. Cast these stitches on by using the cable cast-on method which grabs the working yarn from in between your stitches rather than from within your stitches. You can see I’m grabbing the working yarn for my first made stitch above. I’ve pulled the yarn behind the first stitch on the left needle. For more tips on this method, you can check out my recent cable cast-on post.

I’m chugging along here…
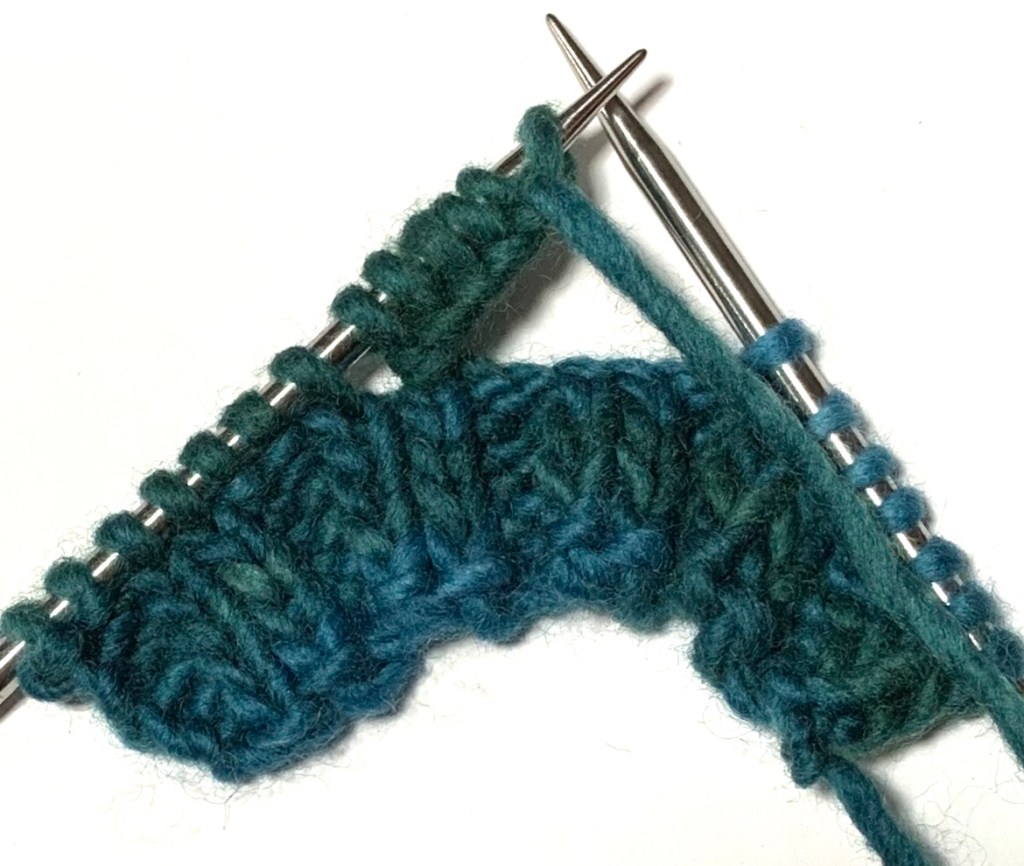
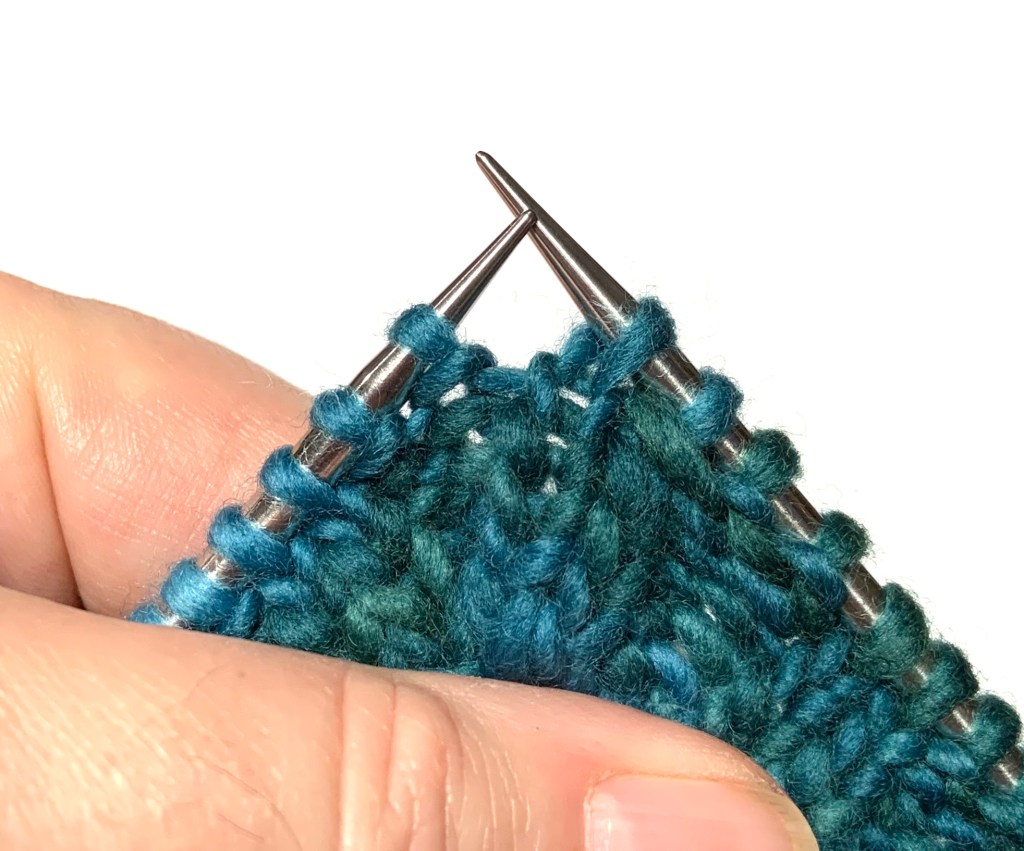
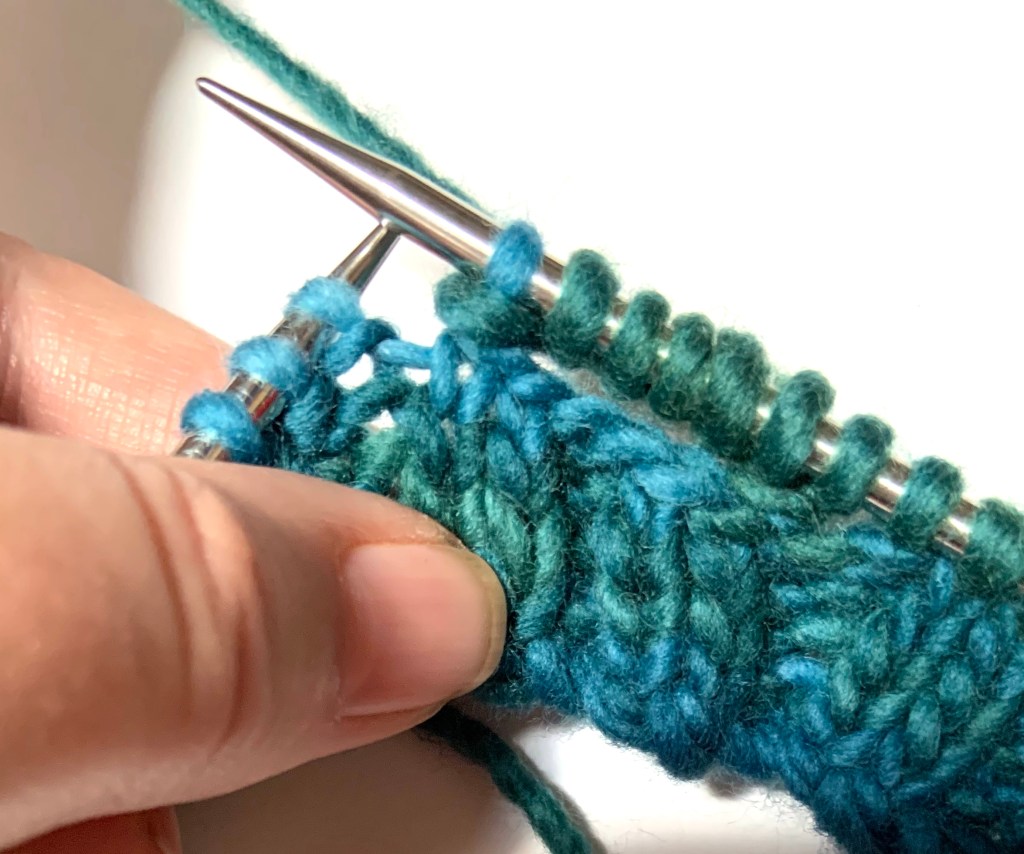
When you have made your last stitch, don’t transfer onto the left needle right away. Leave it on the right needle and bring the yarn to the front in between the stitches. Then and only then, transfer your last stitch to the left needle.
Turn your work again.
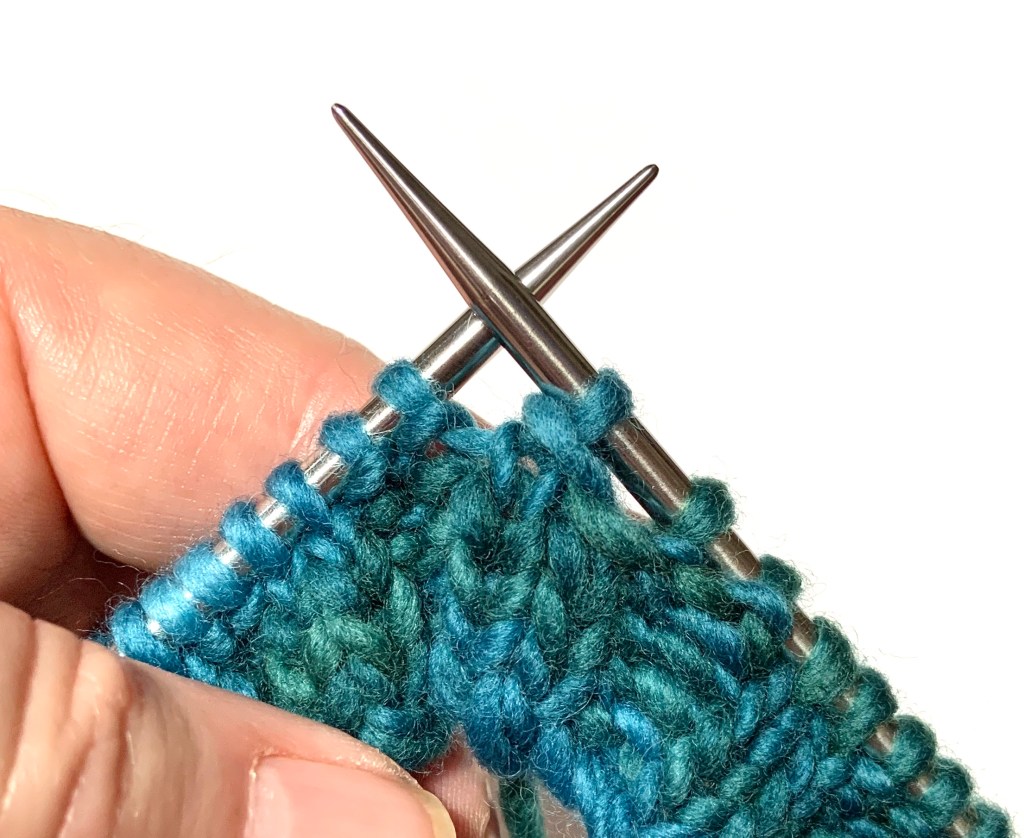
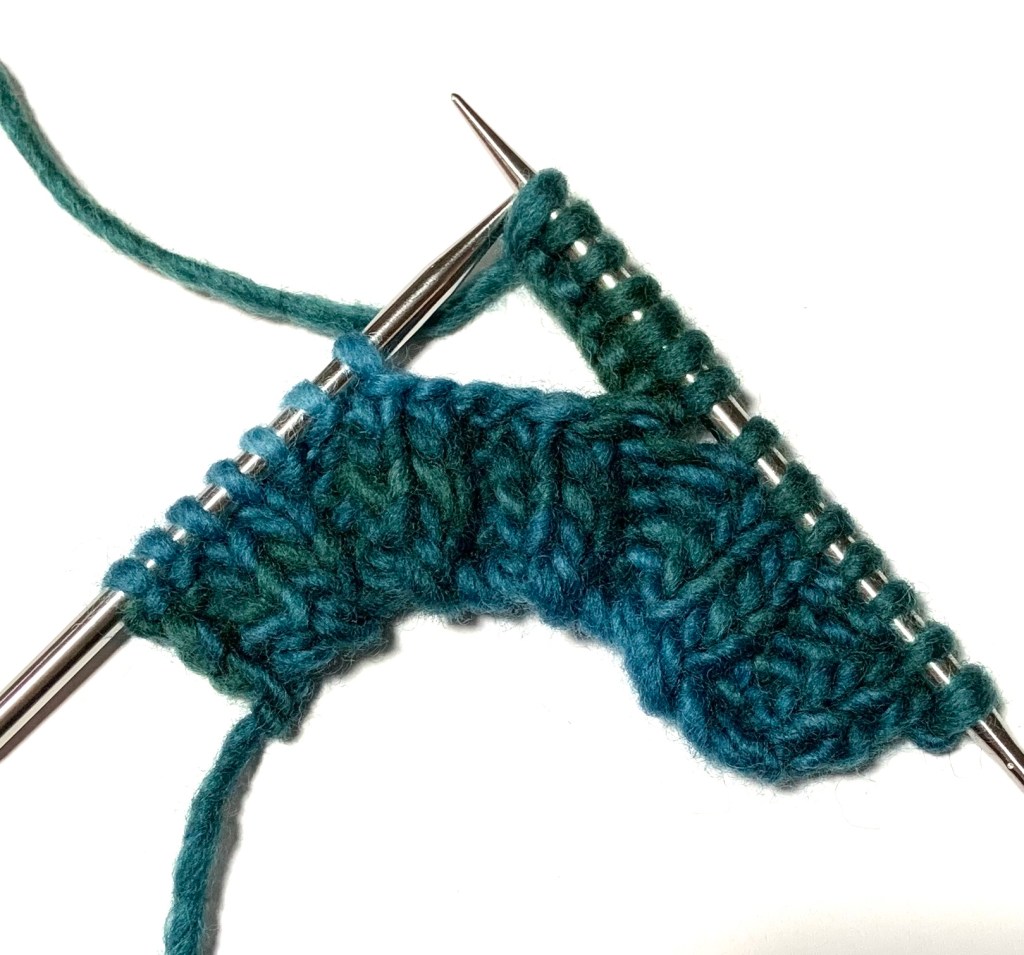
Slip the first stitch on the left needle to the right needle.
Slip the stitch on the right over the stitch that you just slipped over. This was the +1 stitch that you made while casting on. And you’re officially done with the buttonhole!
Resume knitting in your pattern.
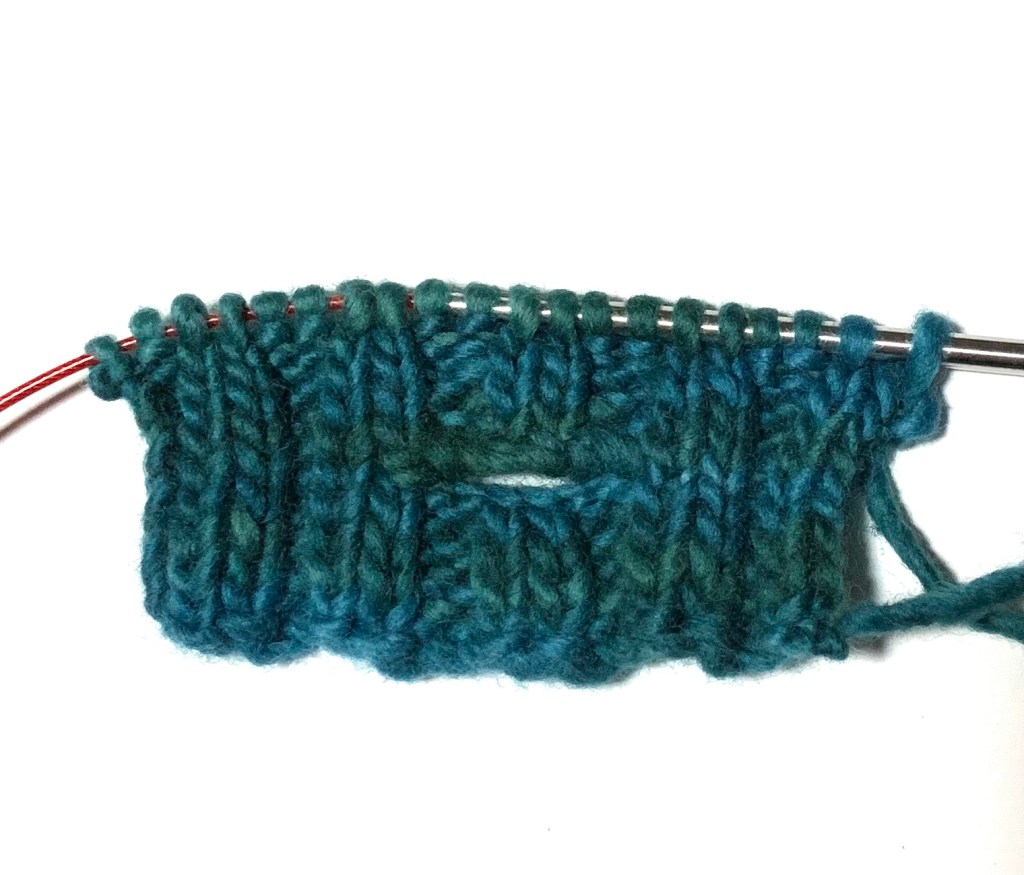
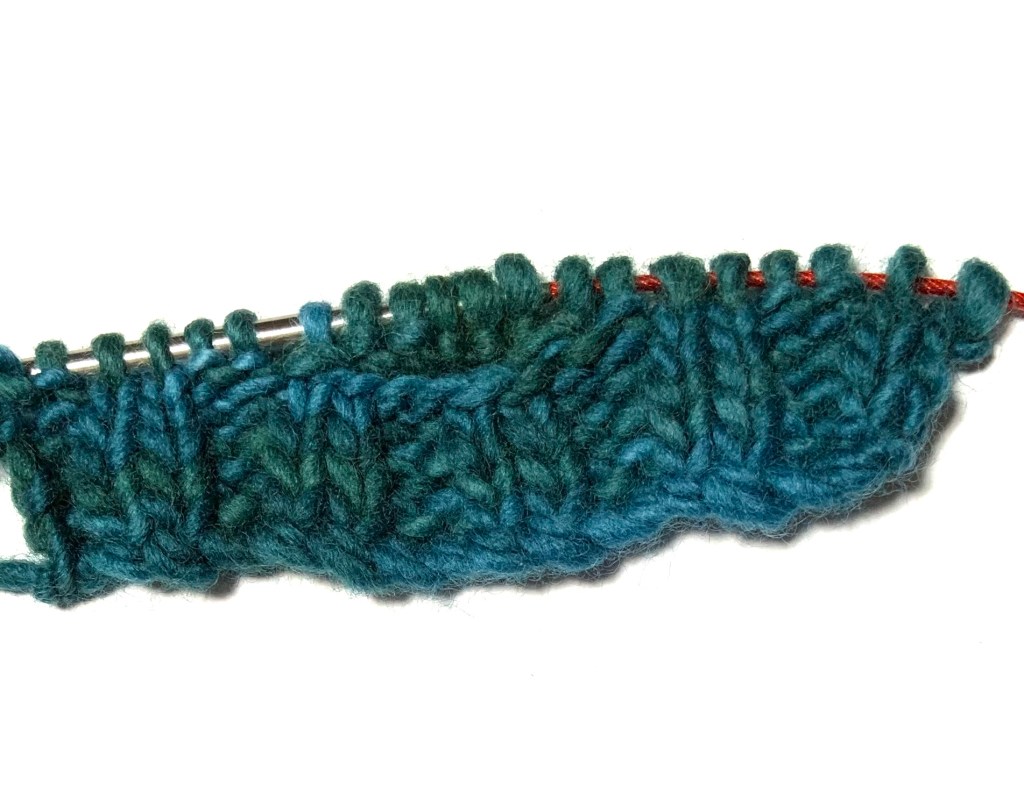
Wasn’t that easy?! And look how neat it is–no annoying loops sticking out at the corners.
You can use this technique to make whatever size or orientation buttonhole you need. It’s firm without being too tight and will not stretch out of shape with use. Happy buttonhole knitting!

Oh! Thanks so much for forwarding this to me! It’s wonderful! So very kind of you. Warm regards, Lorri
LikeLiked by 1 person
Thank you for the still pictures and written explanation. This method works really well for me and I’ve been struggling with other button hole methods for hours
LikeLike
You are most welcome!
LikeLike
Thanks for sharing this method; it’s so easy to follow..A.
LikeLike
I am so glad I found your instructions for a buttonhole. I have found this method produces a neat buttonhole and I really like the fact that you have provided photographs with written text. Videos are helpful but if you keep having to watch them over and over it takes more time finding the part you need to replay, I find being able to progress at my own speed much more useful. Thank you.
LikeLike
You are so welcome!!! I do love this method too.
LikeLike
Straightforward and easy to follow instructions, and a great result. Just what I needed. Thank you!
LikeLike
You are most welcome!
LikeLike